
What are you looking for?
Search

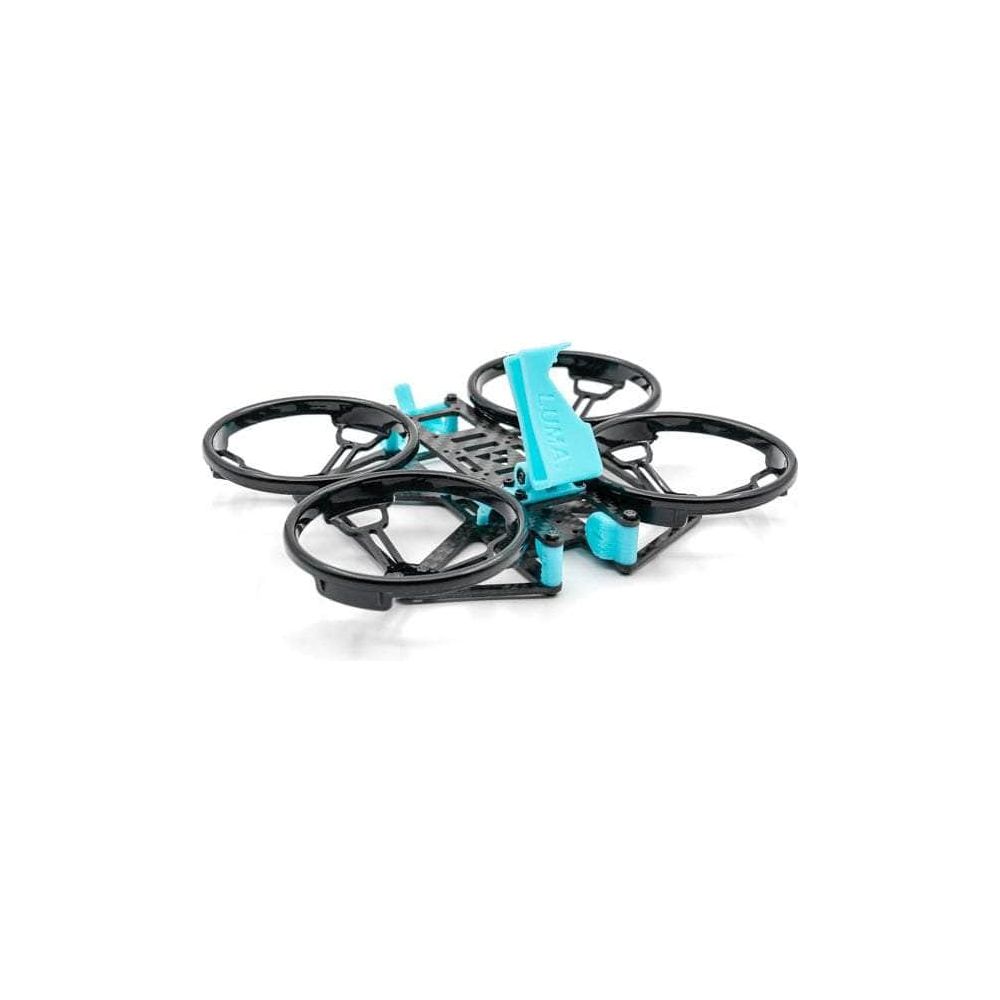
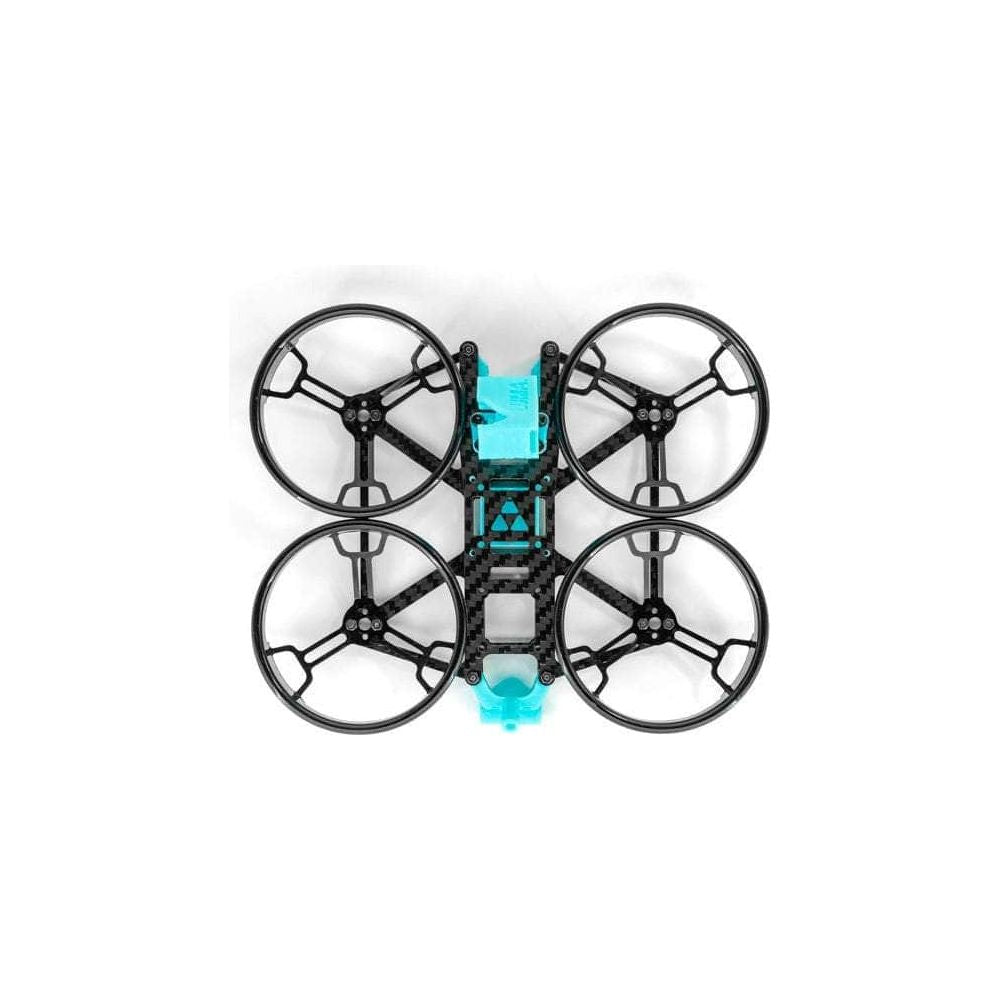
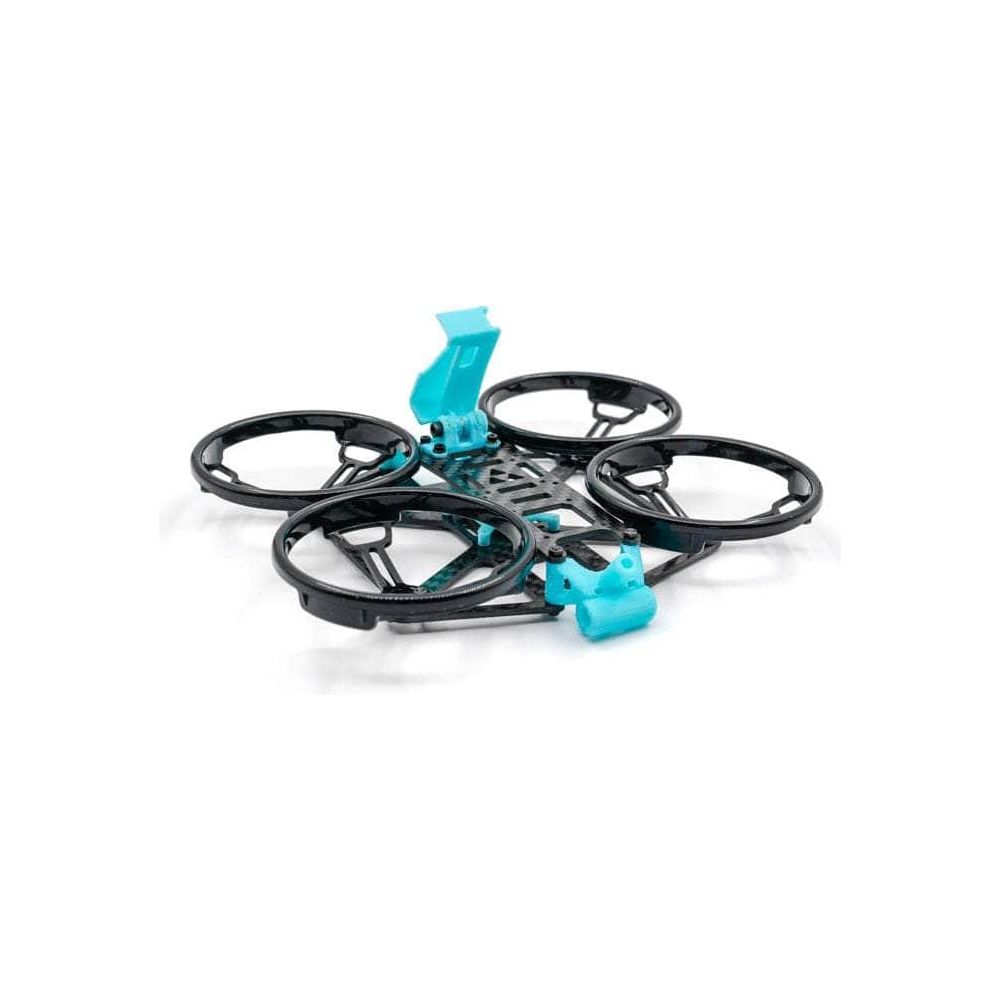


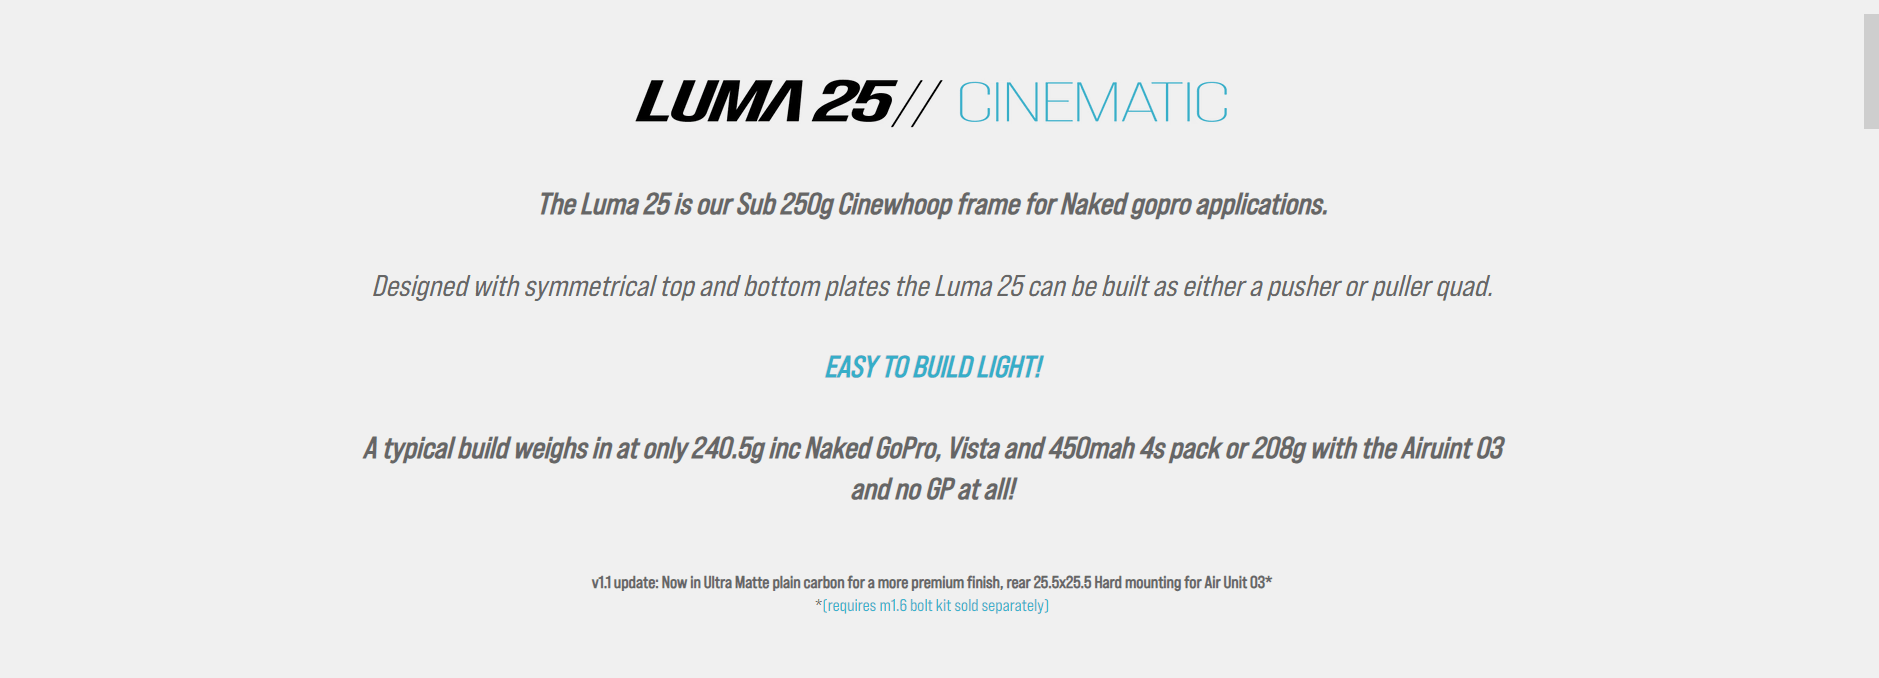
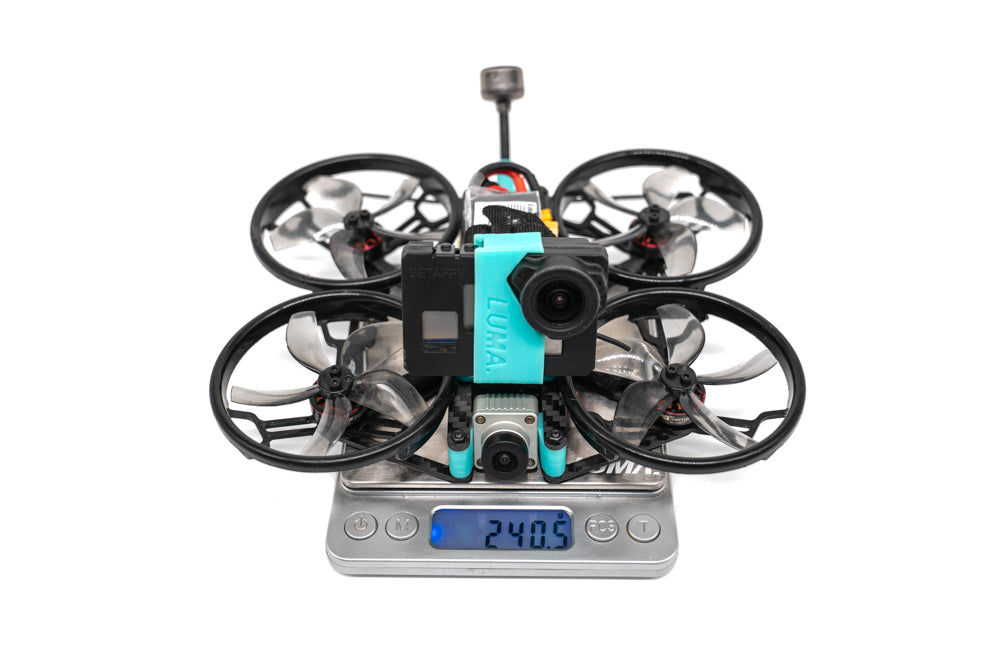
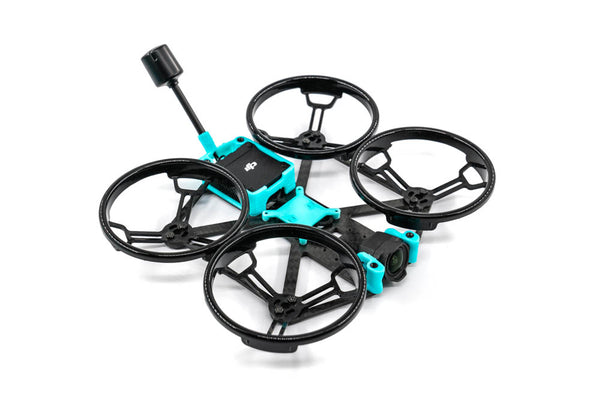
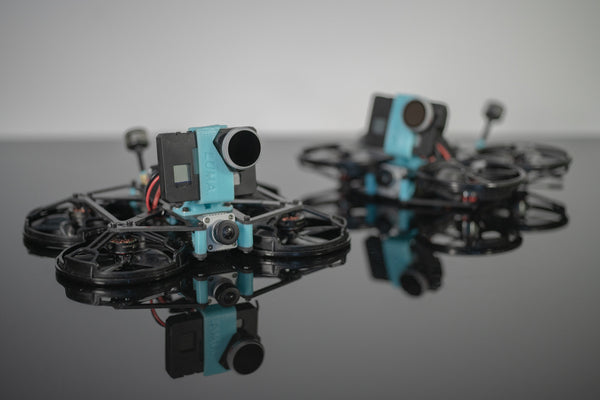
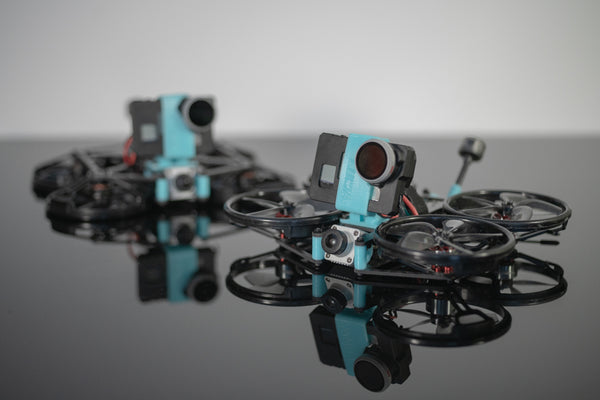
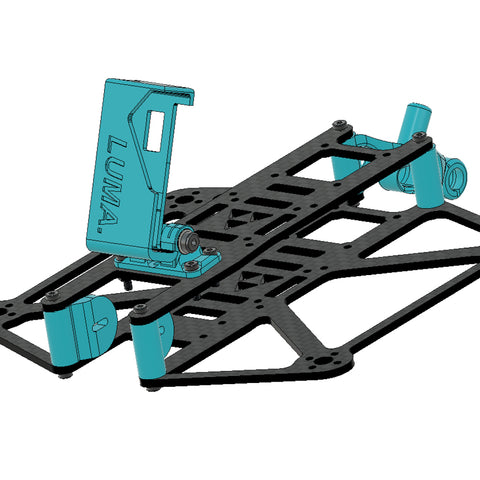
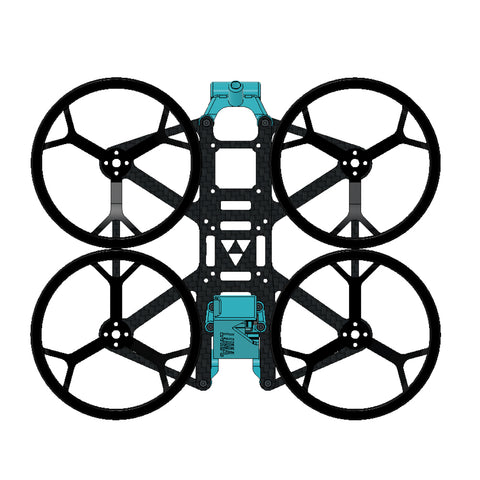
The Luma 25 Frame Kit from Luma Quads is designed for Naked GoPro applications. This modern-designed frame features symmetrical top and bottom plates, where you can be built as a pusher or puller quad. You'll love how light and easy to assemble this kit is, at only 240.5g with a Naked GoPro, Vista, and a 450mah 4S pack, or 208g with an Air unit O3 and no GoPro! A solid frame for those looking to create a 2.5' Cinewhoop! This version comes with black ducts and blue tpu.
Check out our selection of micro frames as well as our Luma Quads Products!
Features
- Symmetrically designed to be built in either Standard or Pusher configurations.
- O3 Air Unit, Mini, Micro and Nano FPV camera options included.
- HD Vista/Air Unit 03 / Analog compatible.
- Slammed 15mm stack height.
- Sub 250g AUW (inc Naked GP and 4S 450mah).
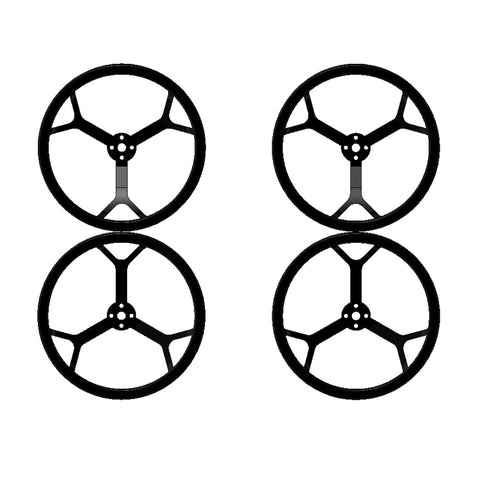
- Support for 2.5' propellers.
- Front Standard GoPro mount (suits any GoPro style camera mount)
Download the 3D model .stl files for this kit here.
Kit includes DJI Air Unit O3 Mounts
Specifications
- Stack Mounting: 20x20mm and 25.5x25.5mm
- Rear Mounting: 20x20mm and 25.5x25.5mm
- Motor Mount Pattern: 9x9mm
- Top Plate Thickness: 2mm
- Bottom Plate Thickness: 2mm
- Motor to Motor: 129mm
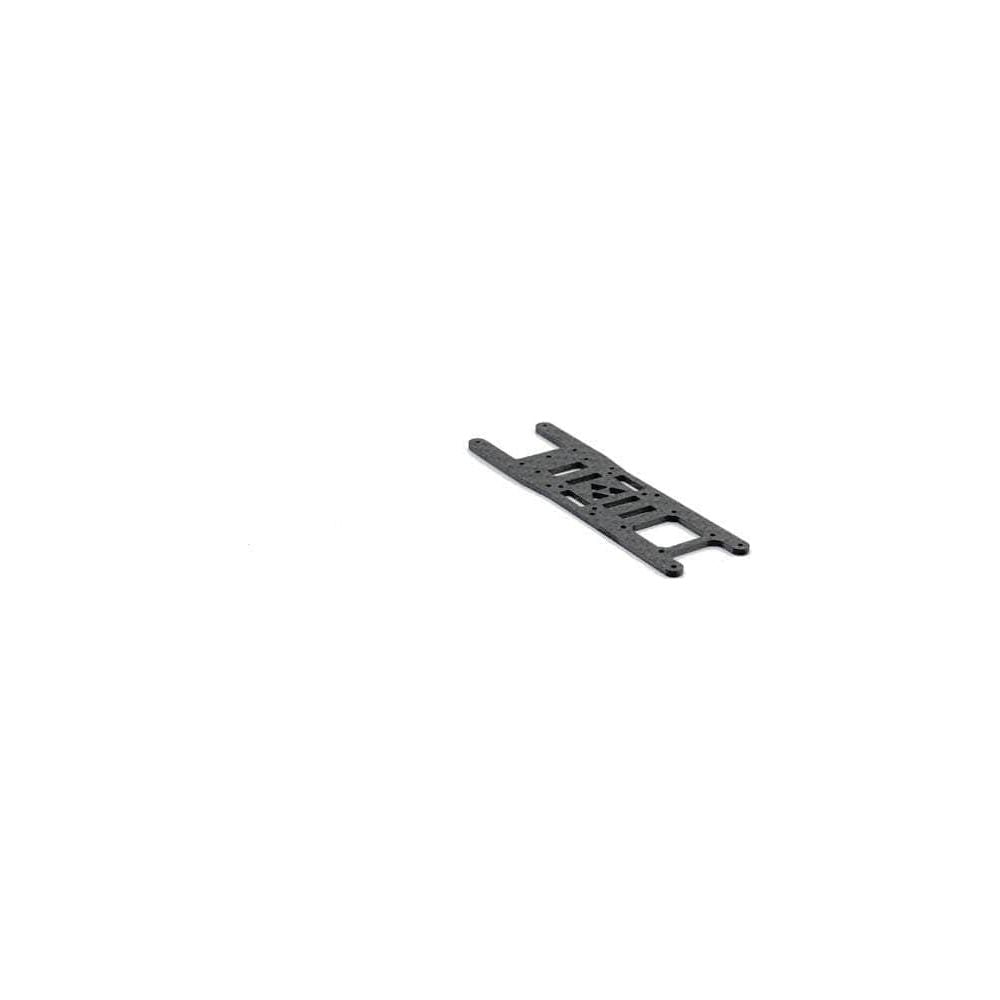
- Frame Weight: 62g
Includes
- 1x Luma Quads Luma 25 Cinewhoop 2.5' Micro Frame Kit
LUMA 25 FRAME ASSEMBLY GUIDE. V1.0
Kit contents:
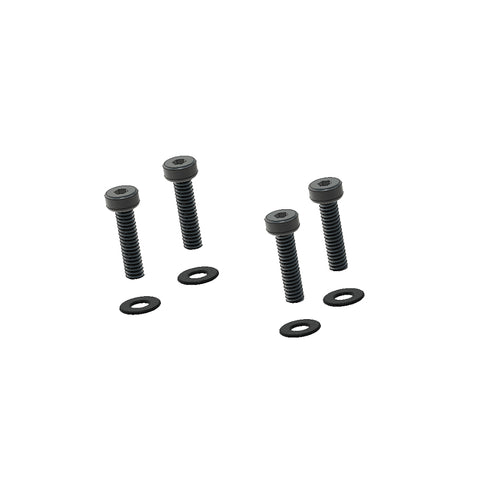
HARDWARE BAG BREAKDOWN:
| Bag A - MAIN | Quantity |
|
|
4x |
| M2 15mm Standoff | 4x |
|
|
|
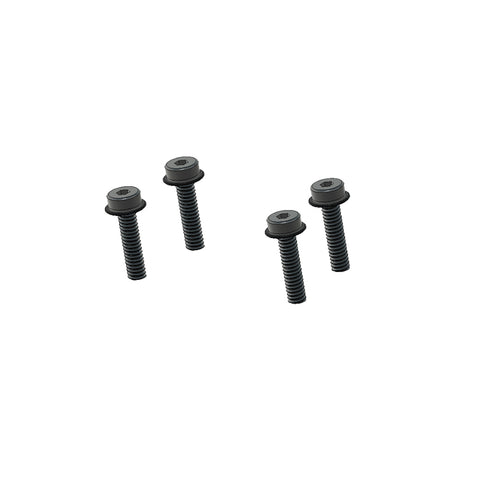
| M2 14mm Bolt | 4x |
|
|
4x |
| Bag C - REAR STACK | |
|
|
4x |
|
|
4x |
| Bag D - MOTORS | |
|
|
16x |
|
|
|
| M2 8mm Bolt | 5x |
| M2 Steel Nut | 5x |
| M2 Steel Washer | 5x |
| M3 16mm Bolt | 1x |
| M3 Steel Nut | 1x |
| M3 Steel Washer | 4x |
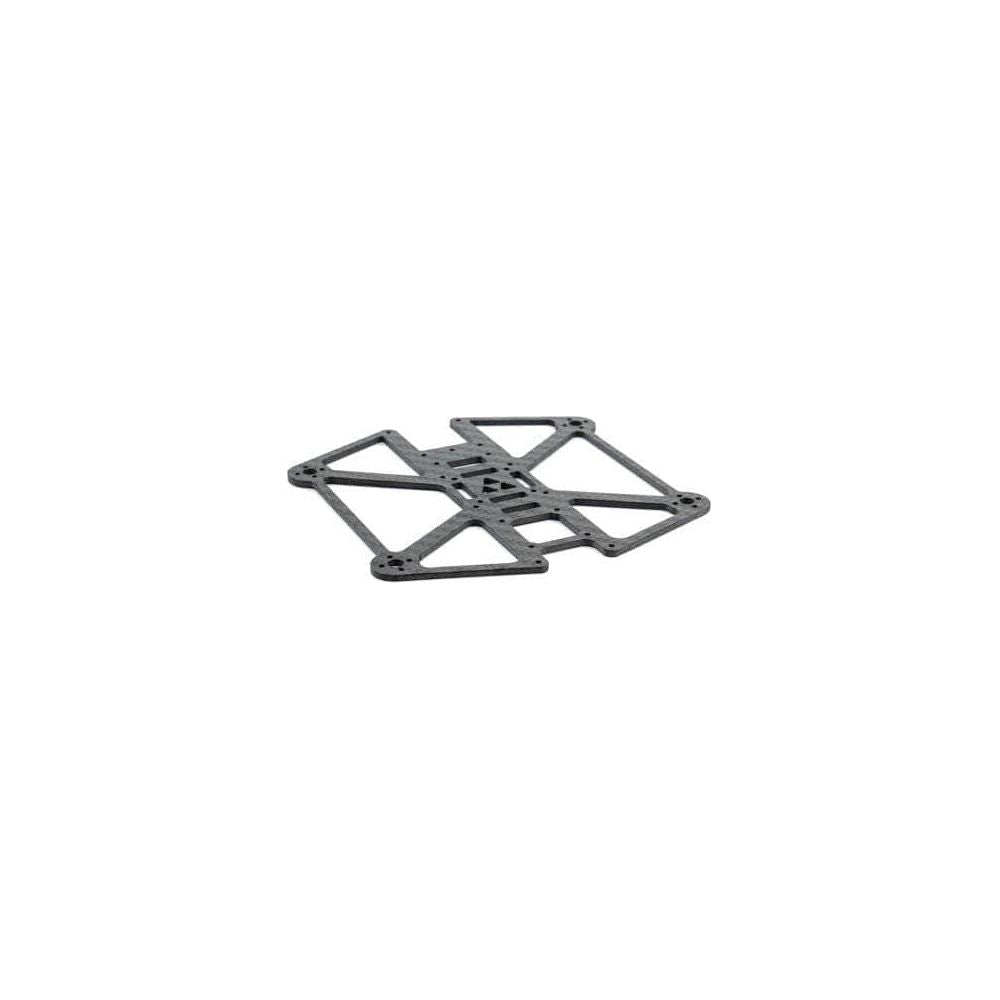
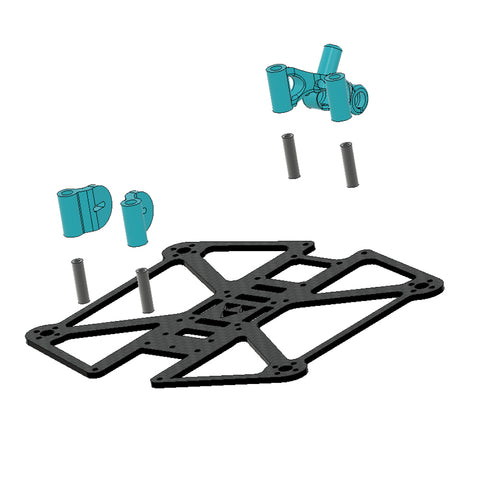
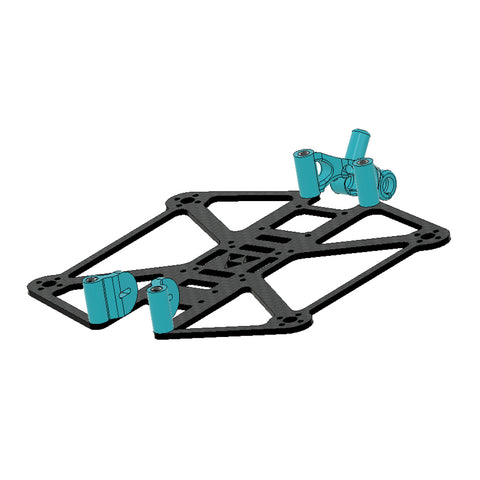
CARBON PARTS.
| 2mm Top-plate | 1x |
| 2.5mm Bottom-plate | 1x |
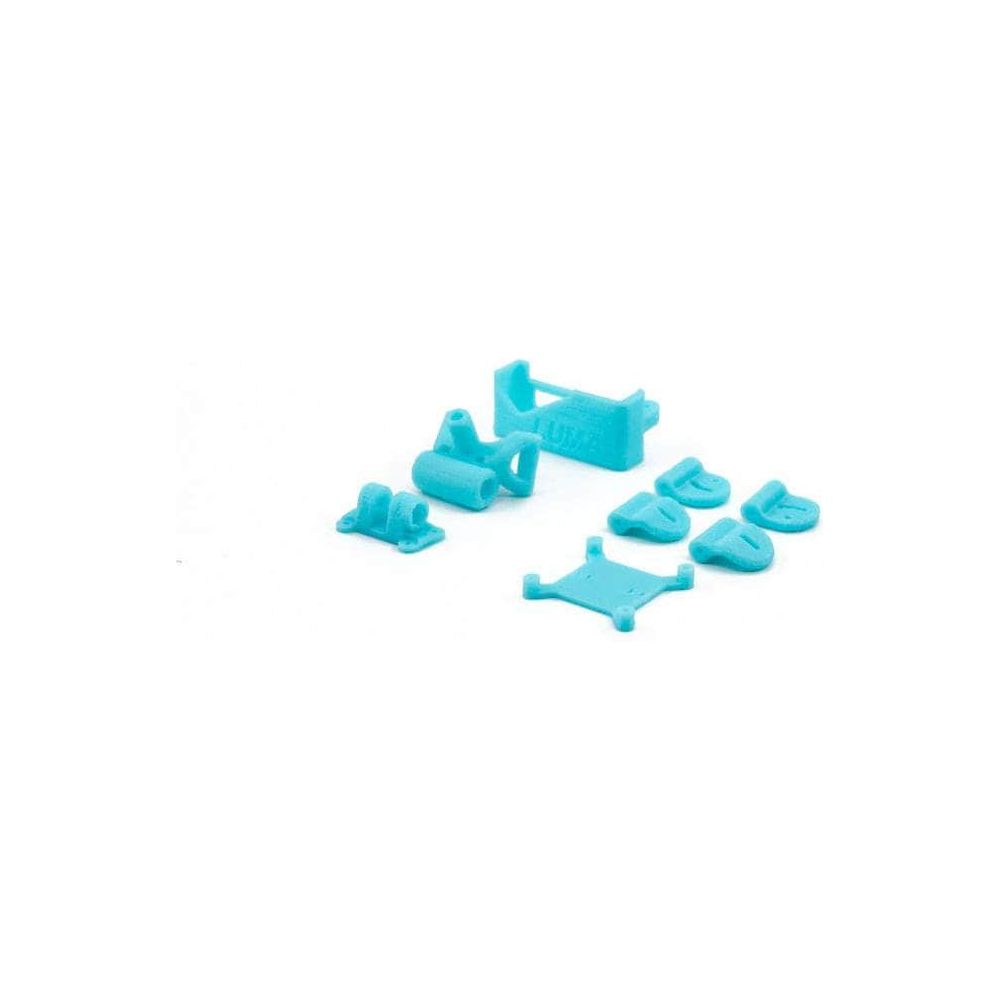
3D PRINTED PARTS.
| Front FPV Camera mounts | 2x |
| Front GoPro Hard-mount | 1x |
| Rear Immortal T & Vista Antenna Mount | 1x |
| 25.5x25.5 Stack RX Mount | 1x |
| Rear 20x20 Analog RX/VTX Mount |
Plastic Parts.
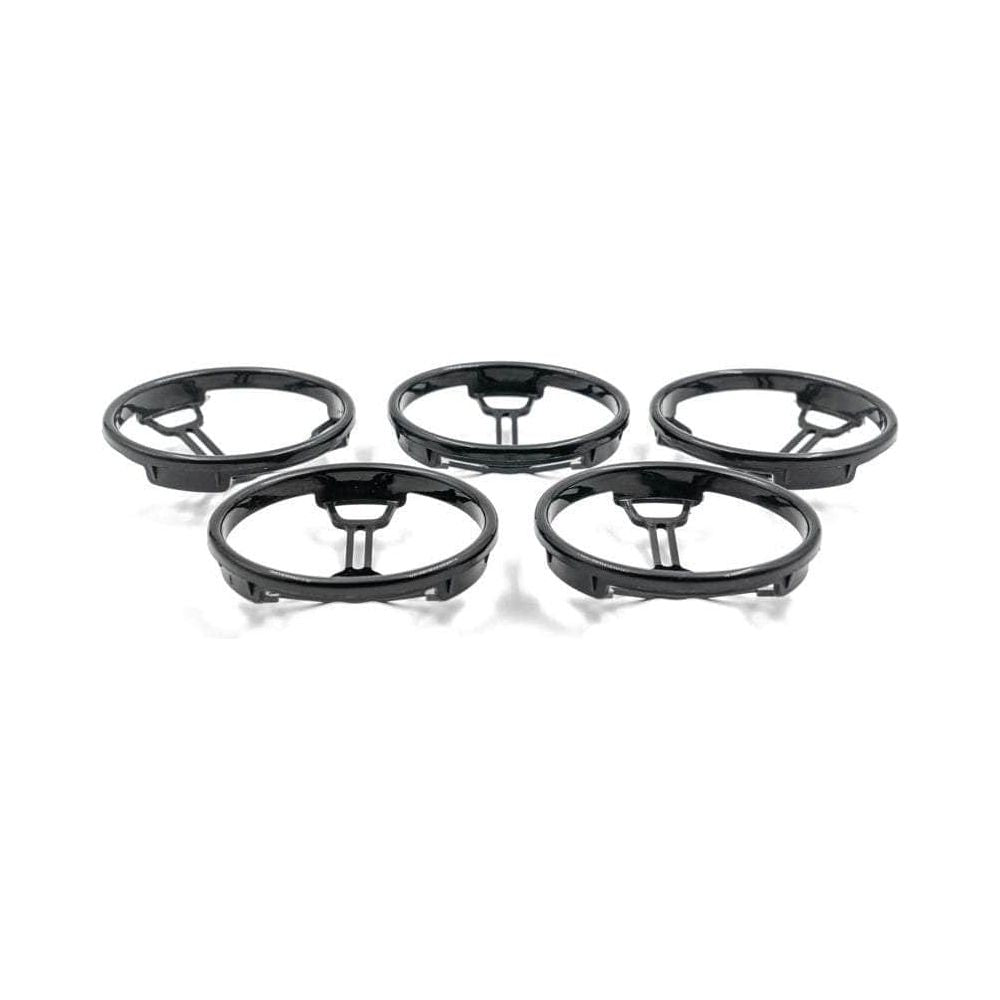
| 2.5' Prop Guards | 5x |
Extras.
| Zipties | 4x |
| 130mm x 12mm Battery strap. | 1x |
Assembly guide.
The Luma 25 is designed to be built in either Standard or Pusher configuration.
The following guide is for Standard configuration, if you want to build the Luma 25 as a Pusher the two carbon plates as well as the guards need to be flipped upside down and you attach the HD mount to the Bottom plate and the standoffs to the Top plate instead.
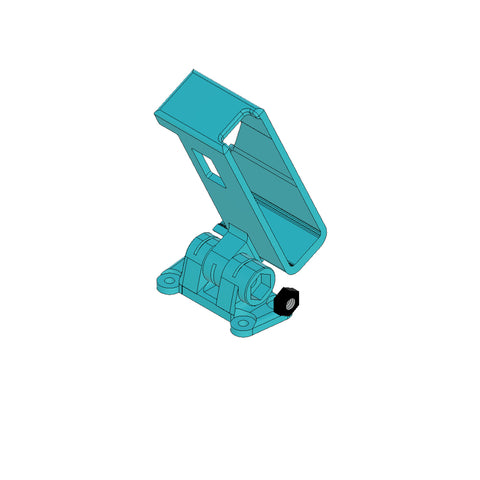
1) HD Mount
Insert 1x M3 Steel washer into the GPLite mount as shown.

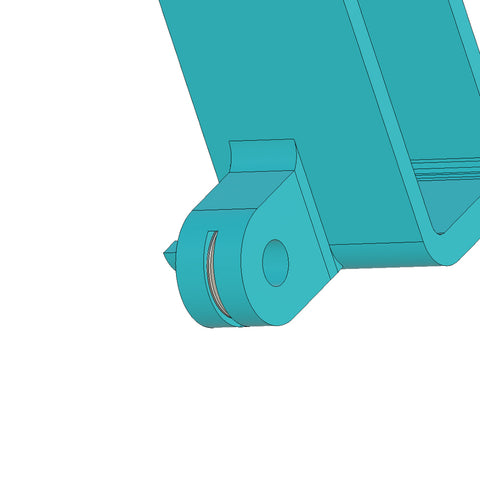
Insert 2x Washers into the HD Cam Mount.
Align GPLite mount up with HD Mount, Insert M3 Nut into HD Mount.
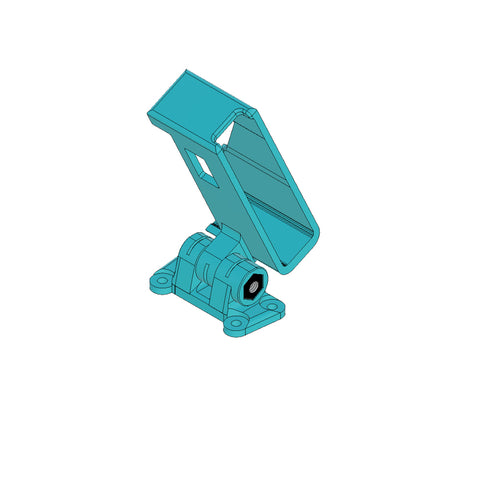
Insert M3 16mm Bolt through M3 washer into HD Mount and secure with M3 nut.
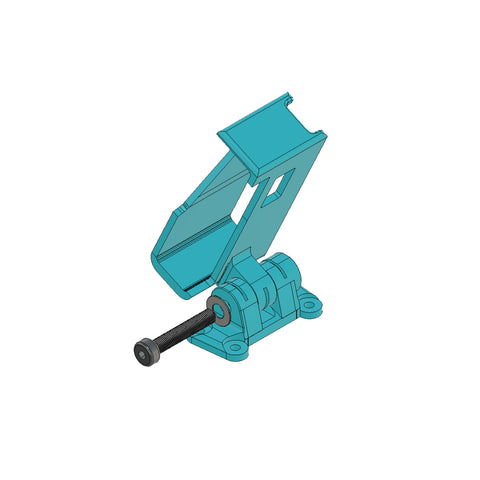
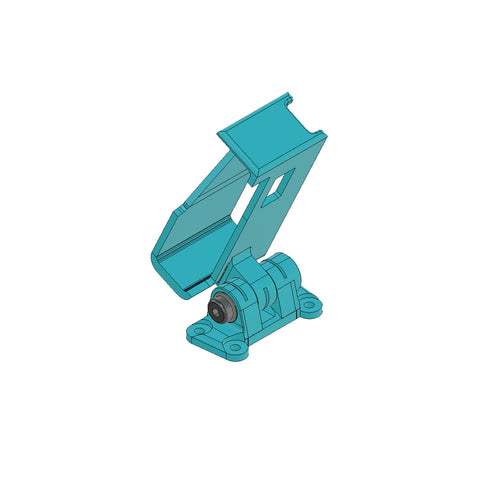
Insert 4x M2 8mm Bolts through 4x M2 Washers.
Insert M2 Bolts and Washers through HD Cam Mount.
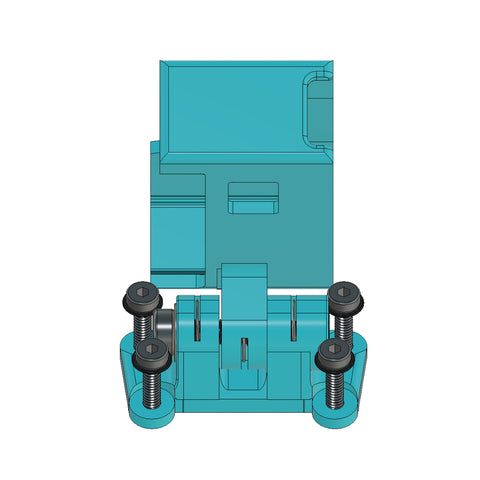
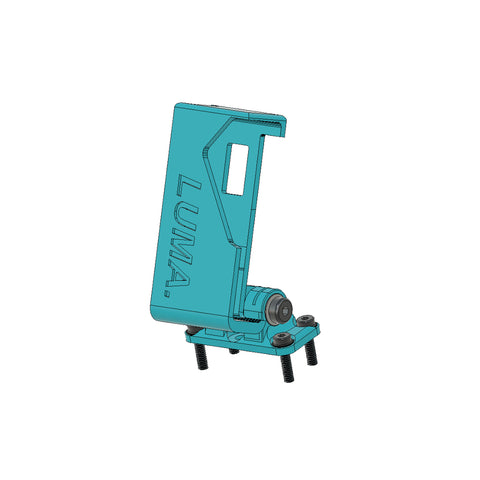
Install HD mount assembly onto Top Plate.
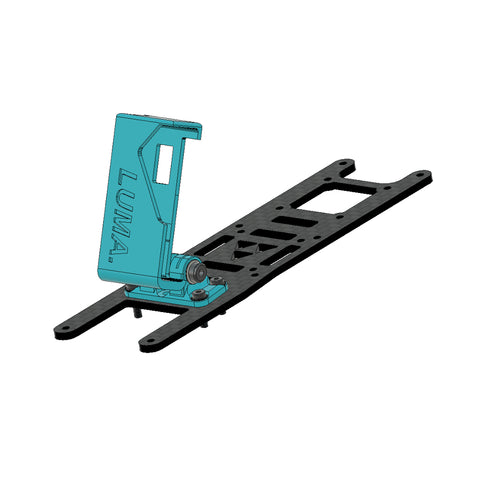
Secure HD Mount to Top plate using 4x M2 Steel nuts.
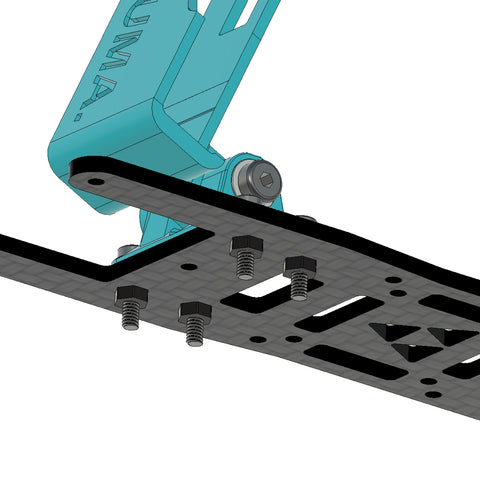
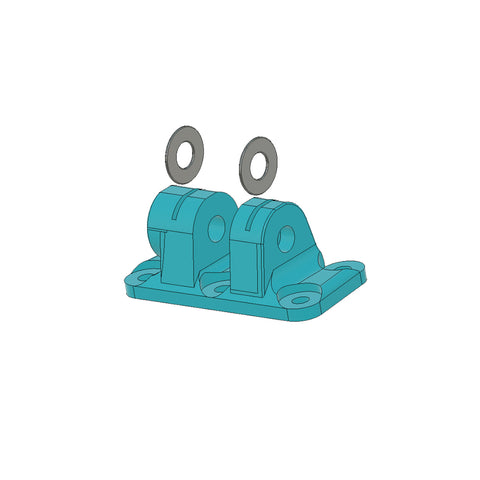
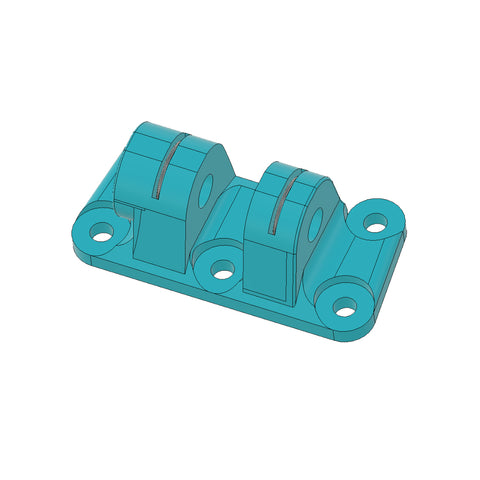
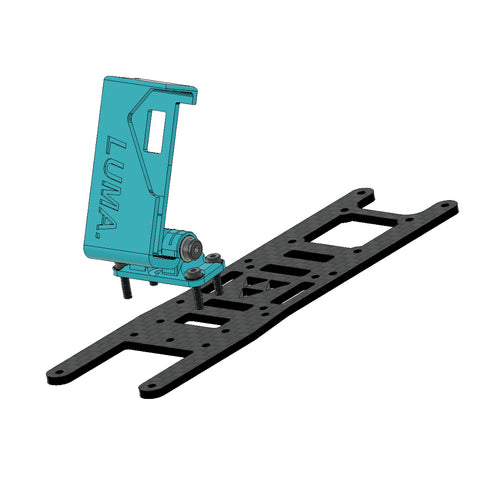
2) Main Frame.
Insert 4x 14mm M2 standoffs into TPU Front camera and Rear antenna mount.
Align with bottom plate.
Insert 8x 8mm Bolts through the Top and Bottom plates into the standoffs.

3) Prop Guards
Align and orientate the prop guards as shown.
Secure using the included 6mm Motor screws through the bottom plate through the guard into the base of the motor.
4) Rear Antenna
Secure the Immortal T antenna Into the rear mount using zipties.
5) Other
The included 25.5x25,5mm or 20x20mm RX mounts can be used either on top of main stack to secure an RX if using Vista or in the rear 20x20mm stack mount position for rear mounted Analog VTX/RX.
Do not let electrical components come in contact with the carbon, use spacers that came with your with FC stack and the included RX/VTX Mounts to space your components away from carbon.

You have successfully commented, please wait for review
Copied Successfully
You can enjoy up to 1 free gift!